How to Connect Turtle Beach Headset to PC?
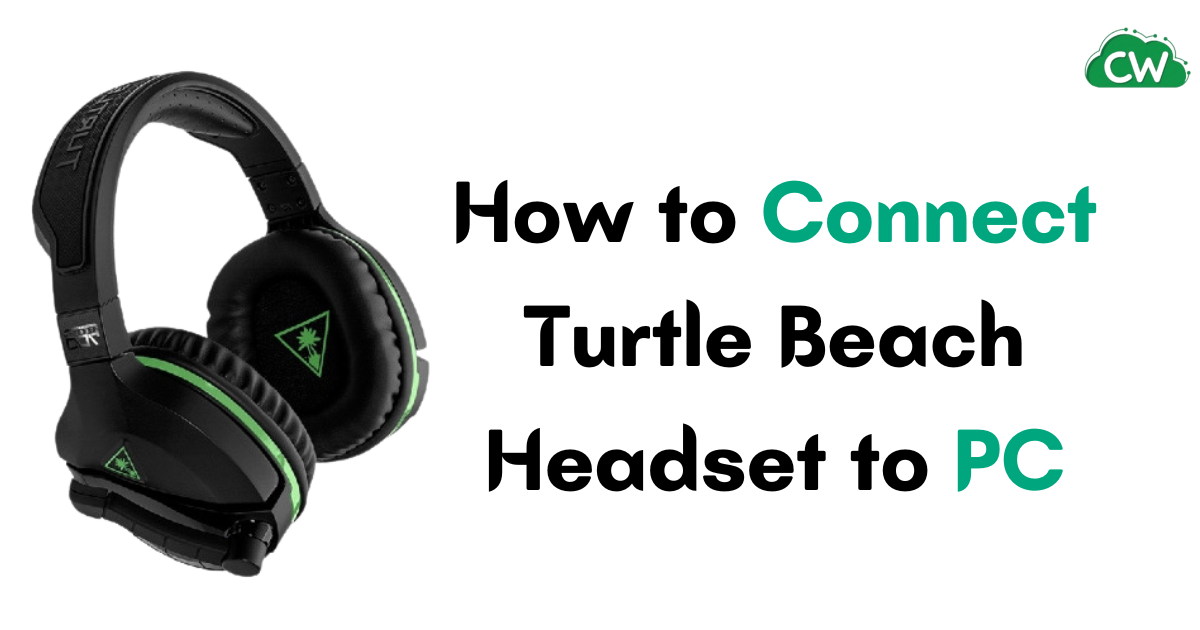
In this step by step guide, I will walk you through the process of connecting your Turtle Beach headphones to your PC.
Whether you’re a gamer or simply want to enjoy high-quality audio on your computer, this step-by-step tutorial will ensure a smooth setup process.
First, let’s talk about the Turtle Beach headphones. Known for their exceptional sound quality and comfortable design, Turtle Beach headphones are a popular choice among gamers and audio enthusiasts.
With their advanced features and versatility, they can be easily connected to your PC for an immersive audio experience.
Now, let’s get into the steps of connecting your Turtle Beach headphones to your PC. Follow these instructions carefully:
- Open the Settings menu on your PC.
- Click on “Bluetooth and Devices”.
- Select “Connected Devices”.
- Choose the “Add a Device” option.
- Press and hold the “Connect” button on your Turtle Beach headphones until the LED light blinks rapidly.
- Windows will detect and add the headphones to your PC.
That’s it! You have successfully connected your Turtle Beach headphones to your PC. Now, you can enjoy the exceptional audio quality they provide.
In the upcoming sections, I will also cover alternative methods of connecting your Turtle Beach headphones to your PC, setting up the headphones, and troubleshooting any issues you may encounter along the way.
So, let’s dive into the details and explore the different ways you can connect your Turtle Beach headphones to your PC!
Method 1: Using an Xbox Wireless Adapter
If you’re looking to connect your Turtle Beach headphones to your PC wirelessly, one of the easiest methods is by using an Xbox Wireless Adapter.
This small device allows you to connect your headphones to your PC seamlessly. Here’s how:
- Connect the Xbox Wireless Adapter to a USB port on your PC.
- Press and hold the power button on your Turtle Beach headphones to turn them on.
- Press the “Enroll” button on the Xbox Wireless Adapter until the LED light starts flashing.
- Press and hold the “Connect” button on the headphones until the LED light blinks rapidly.
- Wait for the LED indicators on both the adapter and the headphones to stabilize, indicating a successful pairing.
By following these steps, you can easily connect your Turtle Beach headphones to your PC using the Xbox Wireless Adapter.
This method eliminates the need for any wires and provides a convenient way to enjoy your audio content without any hassle.
Xbox Wireless Adapter vs. Other Methods
| Xbox Wireless Adapter | Other Methods | |
|---|---|---|
| Wireless Connectivity | Yes | No (wired connection required) |
| Compatibility | Works with Turtle Beach headphones and PCs with USB ports | Works with Turtle Beach headphones and PCs with built-in Xbox wireless feature |
| Convenience | Simple plug-and-play setup | May require additional steps or adapters |
| Flexibility | Allows freedom of movement without wires | Restricts movement due to wired connection |
As you can see from the comparison table, using the Xbox Wireless Adapter offers several advantages over other methods of connecting your Turtle Beach headphones to your PC.
It provides a wireless connection, compatibility with a wide range of Turtle Beach headphones, convenience, and flexibility for an enhanced audio experience.
Method 2: Connecting Without a Wireless Adapter
If you don’t have an Xbox Wireless Adapter, don’t worry! You can still connect your Turtle Beach headphones to your PC without it. Here’s how:
- Open the Settings menu on your PC and click on “Devices”.
- Choose “Connected Devices” and click the “Add a Device” option.
- Press and hold the “Connect” button on the headphones until the LED light blinks rapidly.
- Windows will find and add the headphones to your PC.
It’s important to note that this method requires a PC with a built-in Xbox wireless feature. If your PC doesn’t have this feature, you’ll need to use the Xbox Wireless Adapter mentioned in the previous method.
Alternate Method:
In some cases, you may be able to connect your Turtle Beach headphones to your PC using a Bluetooth connection. Here’s how:
- Make sure your PC has Bluetooth capability.
- On your PC, go to the Settings menu and click on “Devices”.
- Click on “Bluetooth & other devices” and turn on Bluetooth if it’s not already enabled.
- Press and hold the “Connect” button on the headphones until the LED light enters pairing mode.
- On your PC, click on “Add Bluetooth or other device” and select “Bluetooth”.
- Windows will search for available devices, and when your headphones appear, click on them to pair.
Keep in mind that not all Turtle Beach headphone models support Bluetooth connectivity, so make sure to check the product specifications before attempting to connect via Bluetooth.
| Pros | Cons |
|---|---|
| Doesn’t require an Xbox Wireless Adapter | Only works on PCs with built-in Xbox wireless feature |
| Simple and straightforward process | Bluetooth connection may not be available on all Turtle Beach headphone models |
Setting Up Turtle Beach Headphones on Your PC
Once you have successfully connected your Turtle Beach headphones to your PC, it is important to properly set them up to ensure optimal audio performance.
Follow these steps to configure your Turtle Beach headphones on your PC:
- Click on the search icon on your PC and type “Control Panel”.
- Click on “Control Panel” and then on “Hardware and Sound”.
- Select the “Manage Audio Devices” option under the “Sound” tab.
- From the “Playback” tab, click on your headset and select the “Set Default” button at the bottom.
By setting your Turtle Beach headphones as the default audio device on your PC, you ensure that all audio output will be directed through your headphones.
This is especially important if you want to use your headphones for gaming, video calls, or audio playback.
To further customize your audio settings and enhance your listening experience, you can also adjust the sound levels and effects through the audio settings on your PC.
This allows you to fine-tune the audio to your preferences and make the most out of your Turtle Beach headphones.
Recommended Audio Settings
For the best audio experience with your Turtle Beach headphones, consider adjusting the following settings:
| Setting | Recommended Value |
|---|---|
| Equalizer | Flat or tailored to your preferences |
| Virtual Surround Sound | Enabled for an immersive audio experience |
| Bass Boost | Enabled to enhance low-frequency audio |
| Microphone Sensitivity | Optimized for clear voice transmission |
Adjusting these settings can significantly enhance your audio quality while using your Turtle Beach headphones on your PC.
Experiment with different configurations to find the setup that suits your preferences and provides the best audio experience.
Fixing Turtle Beach Mic Not Working on a PC
If you’re experiencing issues with your Turtle Beach headphone mic not working on your PC, there are several troubleshooting methods you can try to resolve the problem.
Firstly, you can enable the mic for recording on your PC by right-clicking on the speaker icon on the taskbar and selecting “Sounds”.
From there, go to the “Recording” tab, find your headphones, right-click on them, and click “Enable”. This should ensure that the mic is properly recognized by your PC.
If enabling the mic doesn’t solve the issue, you can also try setting your headphones as an input device in the sound settings of your PC.
This can be done by opening the Control Panel, selecting “Hardware and Sound”, and then clicking on “Manage Audio Devices”. From the “Recording” tab, choose your Turtle Beach headphones and set them as the default input device.
Updating the drivers for your headphones can also help fix mic-related problems. You can do this by opening the Device Manager, finding your Turtle Beach headphones under the “Audio inputs and outputs” section, right-clicking on them, and selecting “Update driver”.
This will ensure that you have the latest drivers installed, which may resolve any compatibility issues.
FAQ
How do I connect my Turtle Beach headphones to my PC?
To connect Turtle Beach headphones to a PC, follow these steps. First, open the Settings menu and click on “Devices”.
Then, select “Connected Devices” and choose the “Add a Device” option. Press and hold the “Connect” button on the headphones until the LED light blinks rapidly. Windows will find and add the headphones to your PC.
Can I connect Turtle Beach headphones to my PC using an Xbox Wireless Adapter?
Yes, you can connect your Turtle Beach headphones to your PC using an Xbox Wireless Adapter. Simply connect the Xbox Wireless Adapter to a USB port on your PC.
Then, press and hold the power button on your Turtle Beach headphones to turn them on. Press the “Enroll” button on the Xbox Wireless Adapter until the LED light flashes.
Press and hold the “Connect” button on the headphones until the LED light blinks rapidly. Once the LED indicators on both the adapter and the headphones stabilize, it means that both devices are successfully paired.
What if I don’t have an Xbox Wireless Adapter?
If you don’t have an Xbox Wireless Adapter, you can still connect your Turtle Beach headphones to your PC. Open the Settings menu on your PC and click on “Devices”.
Choose “Connected Devices” and click the “Add a Device” option. Press and hold the “Connect” button on the headphones until the LED light blinks rapidly.
Windows will find and add the headphones to your PC. Keep in mind that this method requires a PC with a built-in Xbox wireless feature.
If your PC does not have this feature, you will need to use the Xbox Wireless Adapter mentioned in the previous method.
How do I set up Turtle Beach headphones on my PC?
Once your Turtle Beach headphones are successfully connected to your PC, you need to set them up. Click on the search icon on your PC and type “Control Panel”. Click on “Control Panel” and then on “Hardware and Sound”.
Select the “Manage Audio Devices” option under the “Sound” tab. From the “Playback” tab, click on your headset and select the “Set Default” button at the bottom.
This will set your Turtle Beach headphones as the default audio device on your PC, allowing you to use them for all audio output.
What should I do if my Turtle Beach headphone mic is not working on my PC?
If your Turtle Beach headphone mic is not working on your PC, there are several methods you can try to fix the issue.
First, enable the mic for recording on your PC by right-clicking on the speaker icon on the taskbar and selecting “Sounds”. Go to the “Recording” tab, find your headphones, right-click on them, and click “Enable”.
If that doesn’t work, you can try setting your headphones as an input device in the sound settings of your PC. Updating the drivers for your headphones and re-enabling the headphone mic through the Device Manager can also help resolve the issue.


